Configure
Selenium WebDriver, Java and Eclipse
Java:
Download and Install latest Java SE Development Kit 7 (JDK)
from
Oracle
Setup environment variables for Java:
Windows 7:
- Select Computer from the Start menu >
Properties
- Click Advanced system settings > Advanced tab
- Click on Environment Variables, under System
Variables, find PATH, and click on it.
- In the Edit windows, modify PATH by adding the
location of the class to the value for PATH. If you do not have the item PATH,
you may select to add a new variable and add PATH as the name and the location
of the class as the value.
- Click Ok.
Eclipse
- Download Eclipse (Eclipse IDE for Java Developers) from http://www.eclipse.org/downloads/
Note: Make sure
to choose correct version as per your OS (Windows 32 Bit and 64 Bit).
- Unzip the ‘eclipse’ folder from the zip to some directory.
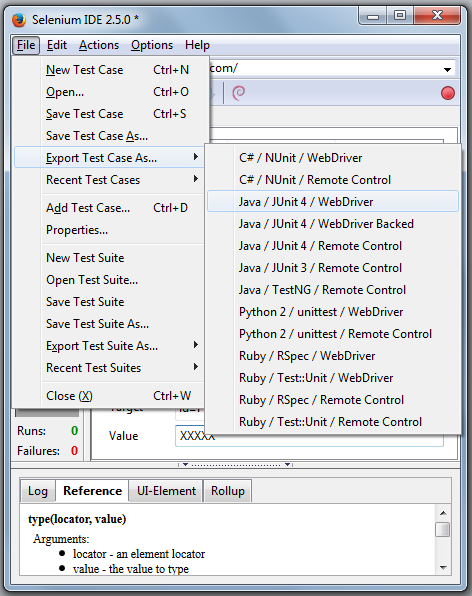
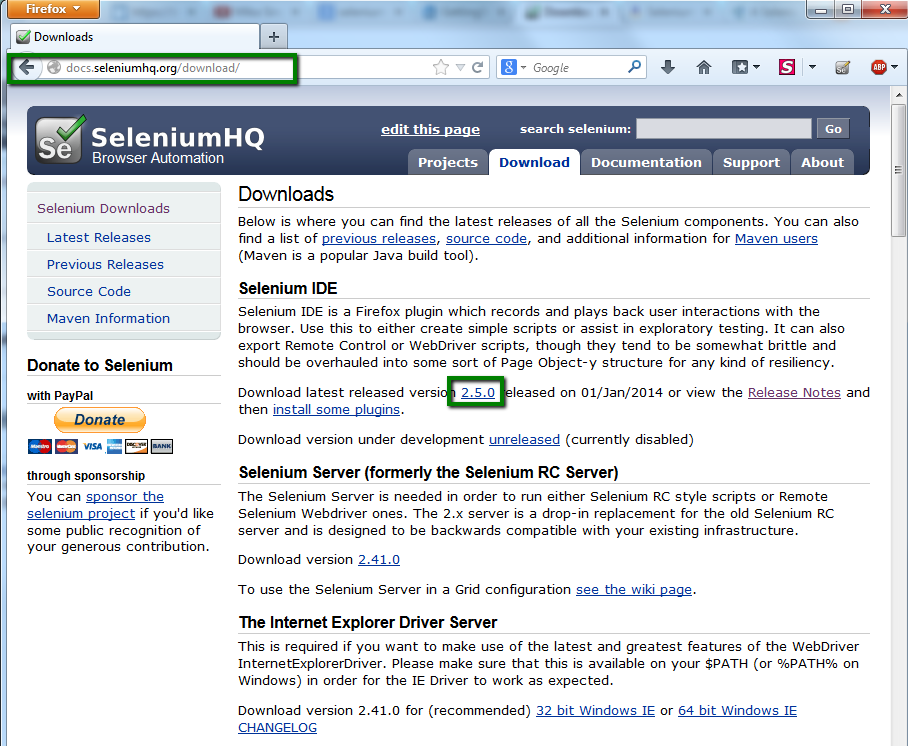
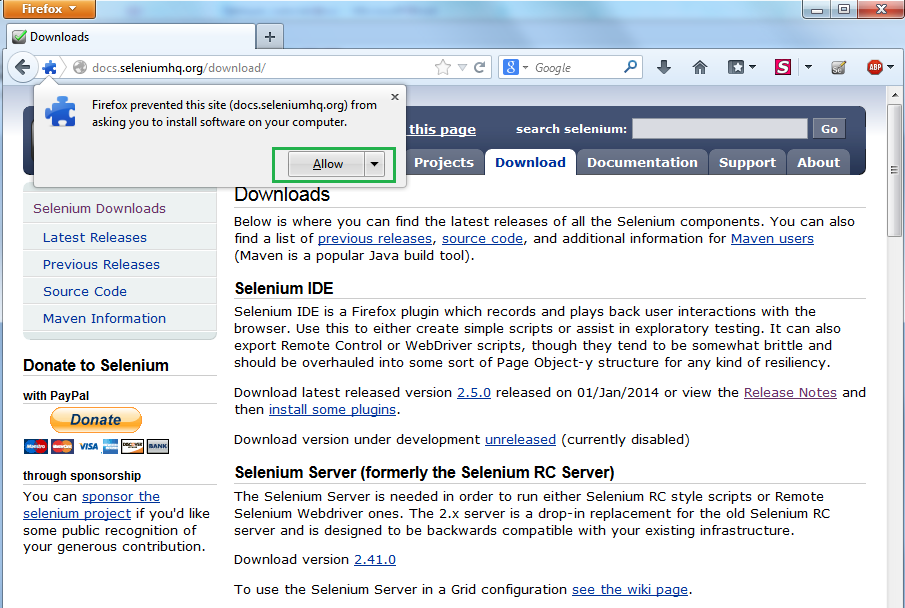
Download Selenium
Client & WebDriver Language Bindings
and unzip the selenium-java-2.x.x.zip folder to some
directory.
Setup a Project in
Eclipse:
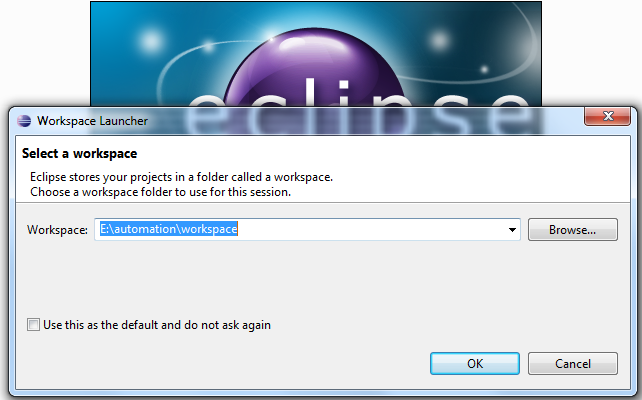
Launch eclipse: Launch eclipse and provide workspace location.
Select Workbench:
Create a new project:
Click on File menu –> New –> Java Project -> Enter project name as
“Selenium_Automation” and click finish.
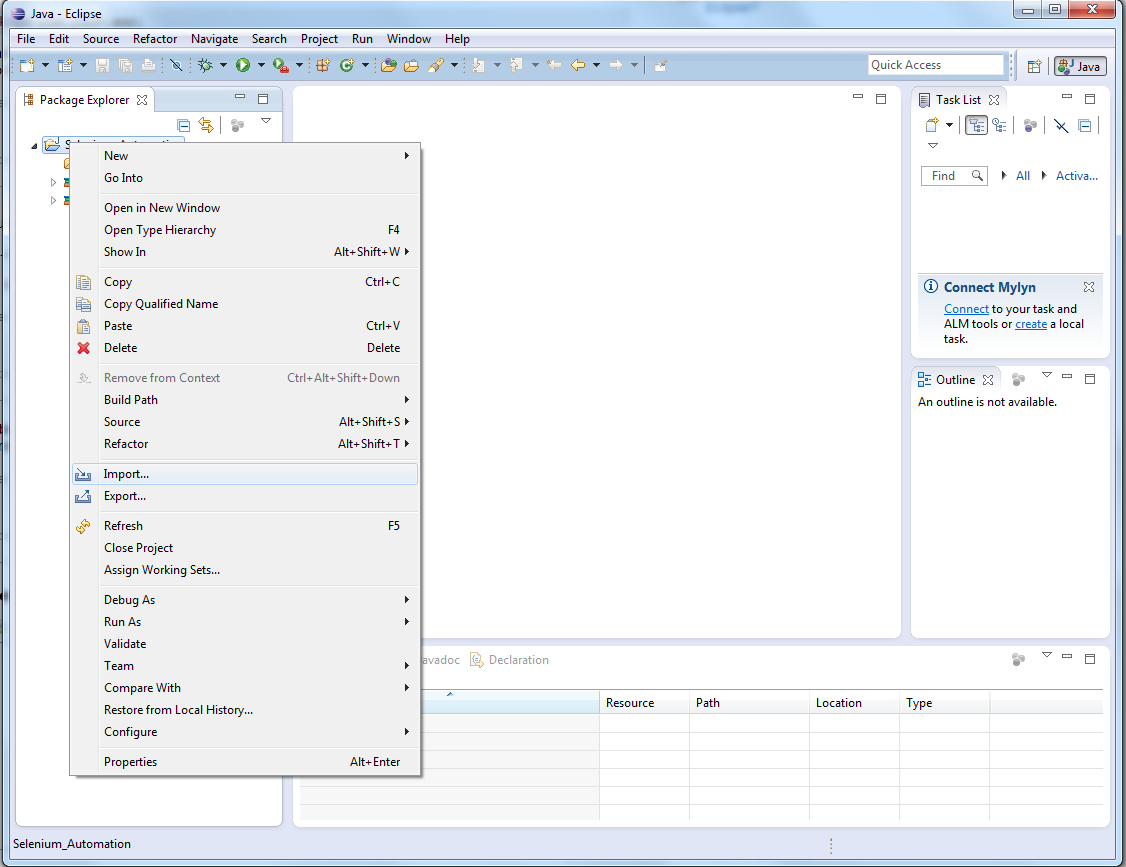
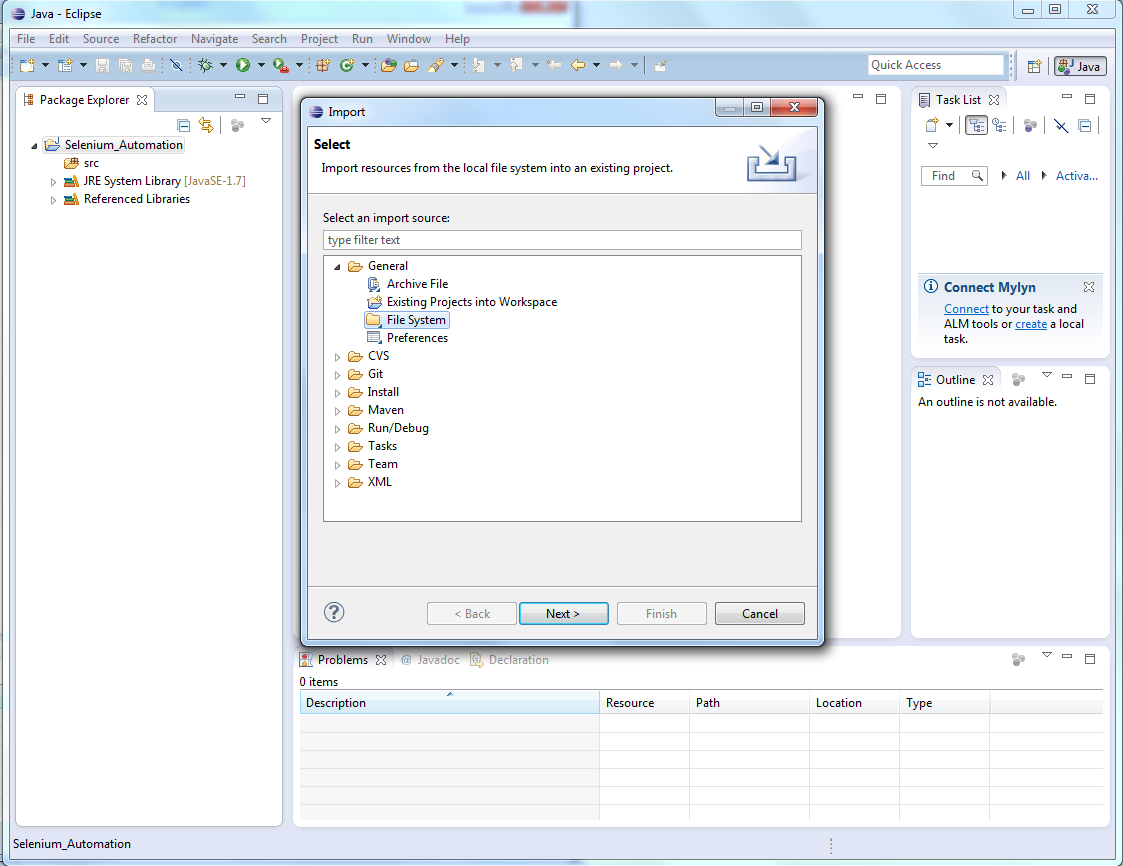
Configure Build Path:
Right click on Project Name > Properties > select Java
Build Path… > select Libraries tab > click Add External JARs... > add
WebDriver JARs (by providing the location of extracted WebDriver language bindings/JARs)
OR
Right click on Project Name > Build Path > click
Configure Build path… > select Libraries tab > click Add External JARs...
> add WebDriver JARs (by providing the location of extracted WebDriver language bindings/JARs )
Now your environment
is ready to run selenium scripts