Friday, 11 April 2014

WebDriver and TestNG: Capture Screenshot when Test fails

In this post will cover how to capture screenshot using Selenium WebDriver and TestNG Listeners when any test fails. To do so we have to extend TestListenerAdapter class.


TestListenerAdapter class implements ITestListener interface, So whenever a test fails it invokes method onTestFailure(ITestResult tr) and that we will use to call our custom method to take screenshot.


Monday, 7 April 2014

Selenium WebDriver: Handle File Upload

In this post, we'll cover how to upload files using WebDriver.

As we click on 'Browse' button it opens windows ‘File Upload’ dialog, which cannot be handled by WebDriver as it can only handle web based application


So to make it work, first make sure that element is visible and Instead of clicking on Browse button will use sendkeys()

  • Find the xpath of 'Browse' button
  • Enter absolute path of file to upload
  • Find xpath of 'Upload' button and click. 

Export Selenium Test from IDE to Eclipse| First Selenium WebDriver Program in Java | Eclipse, WebDriver, JUnit 4

By the end of WebDriver Tutorial you will be able to write your first Selenium WebDriver Script in Java. We will export the Selenium IDE recorded script and can use it with any other IDE like Eclipse.

To install Selenium IDE, please read my post 'Installing Selenium IDE'

Now, record the sequence you want to automate using Selenium IDE.  To learn more about how Record | Play and Modify script in Selenium IDE please read my post 'Record | Play | Modify script in Selenium IDE'.

Export Test case from Selenium IDE to Eclipse in Java and JUnit:
I have used  login sequence to Gmail as an example  in this post.  
  1. Now once you have recorded the steps/sequence, you will observe few Commands with their Targets/ Values in Selenium IDE Table Tab.


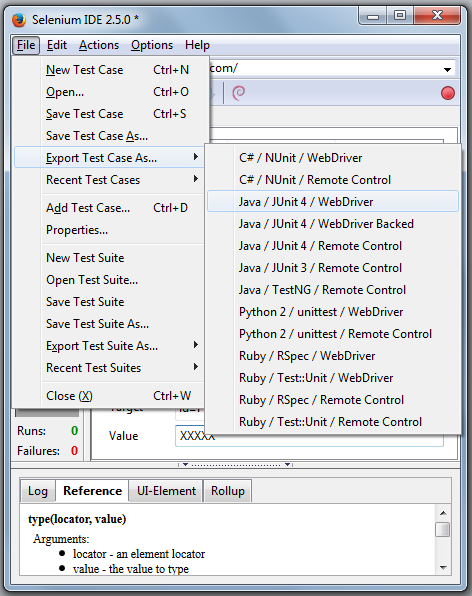
  2. From Menu click on File > Export Test Case As… > select Java/ JUnit 4 / WebDriver


  3. Save that file as .java


Import script in Eclipse: (Eclipse| WebDriver | JUnit 4)
If you don't have your Eclipse environment ready then please refer my post 'Configure Selenium WebDriver, Java and Eclipse'
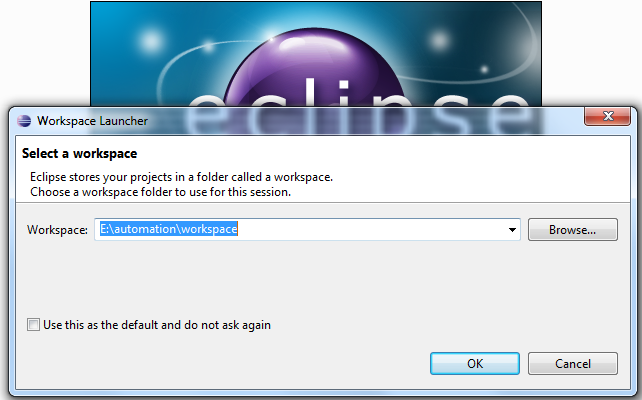
  1. Launch eclipse.

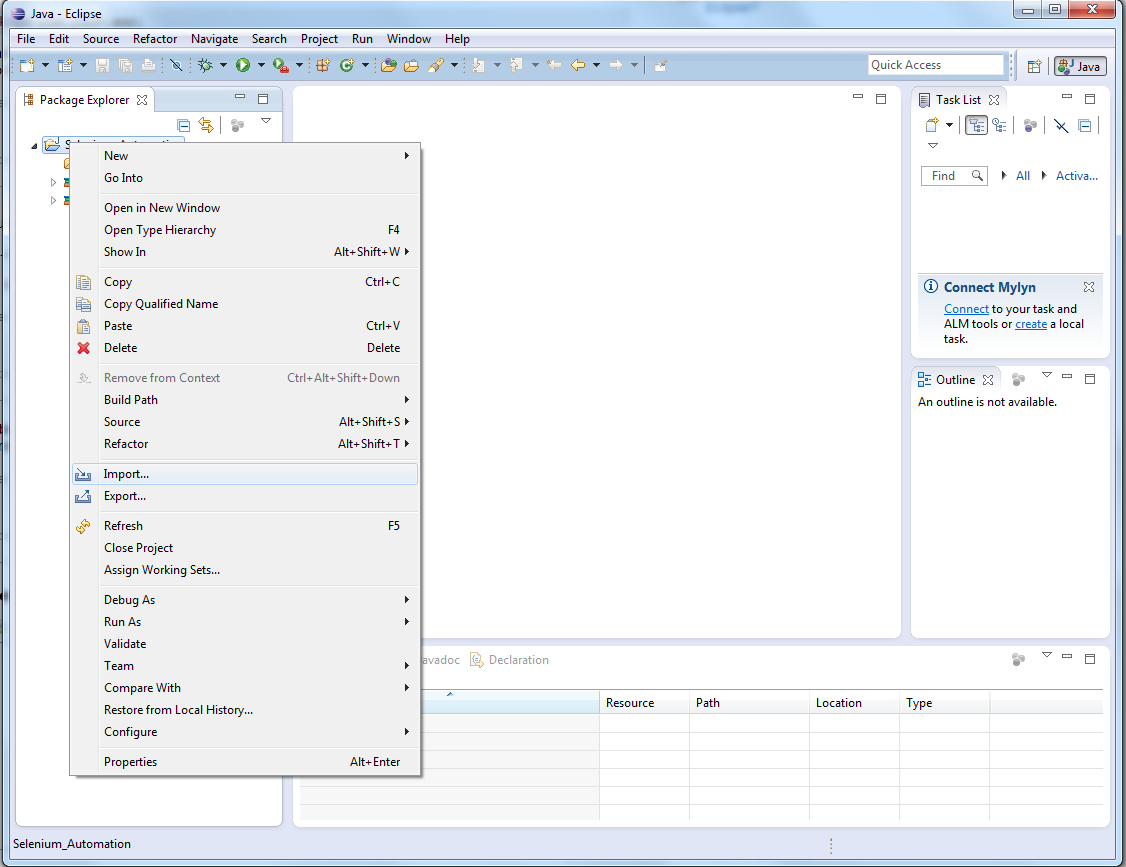
  2. Right click on ‘Project name’ > Select ‘Import


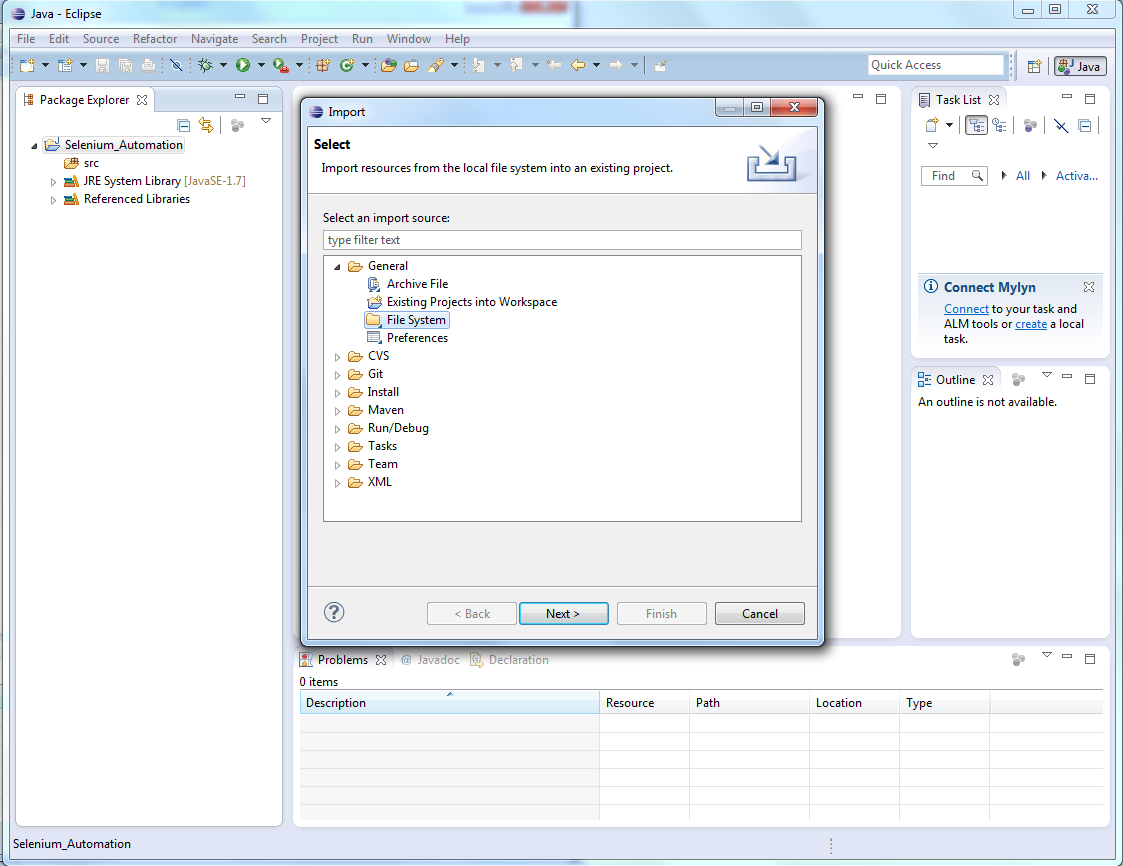
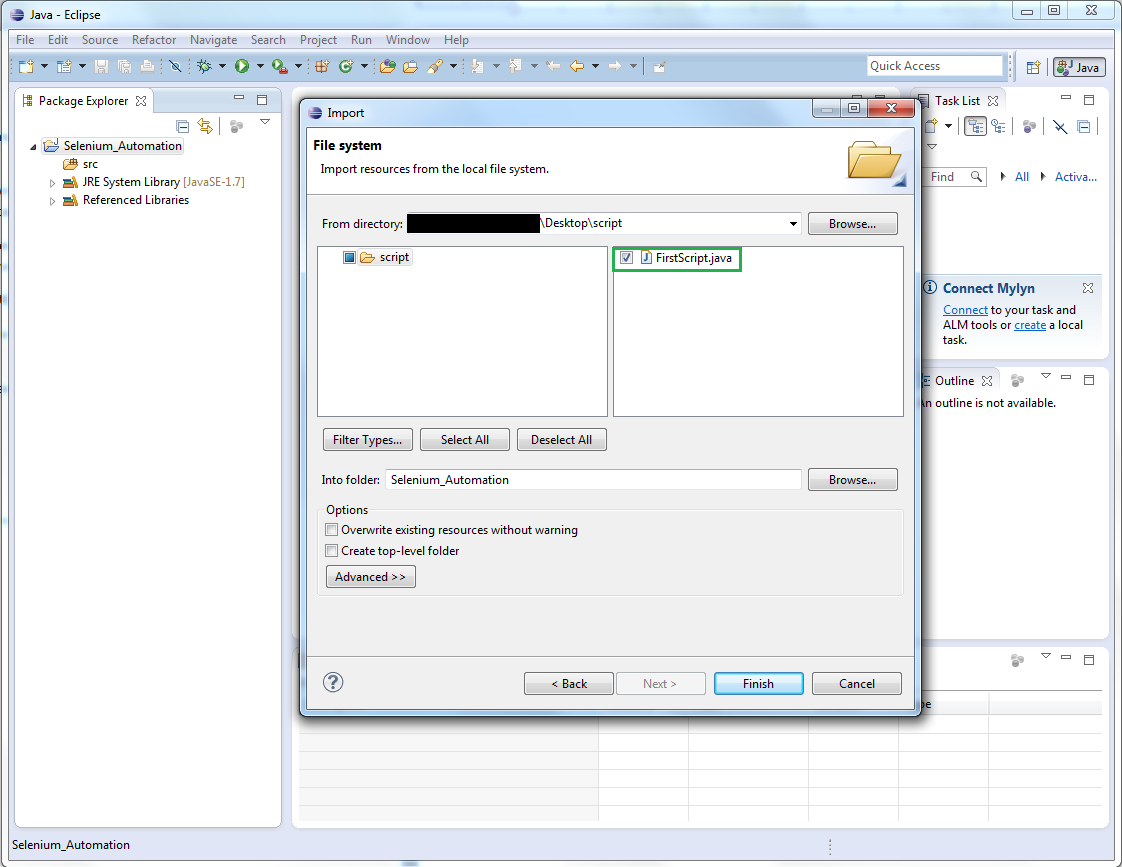
  3. Select ‘File System’ and click ‘Next’


  4. From directory’ > click on ‘Browse’ and provide the location of the saved script .java file.

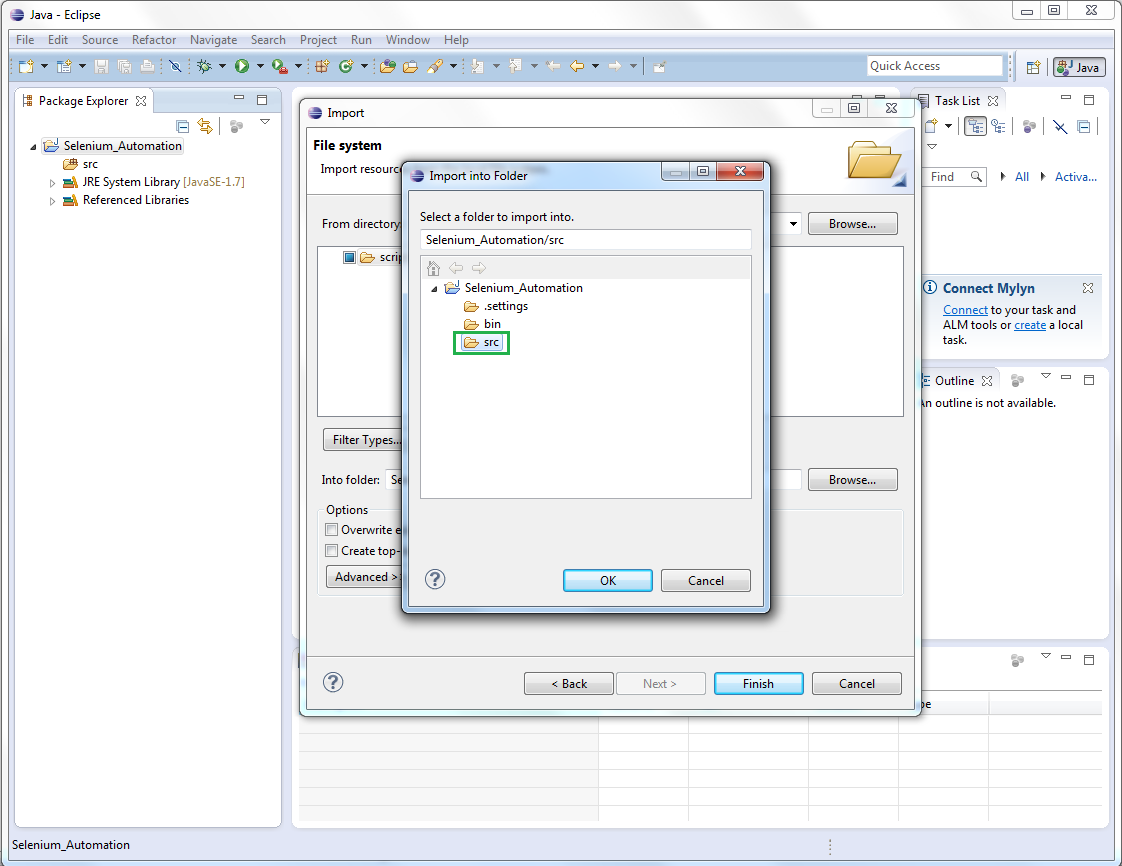
  5. Into Folder > click on ‘Browse’ and select ‘src’ folder of the project.


  6. Click Finish.

Fix Errors and Warnings in script:

Fix Error:
  • After importing the .java file you will see an error appearing in the code at 1st line. (as com.example.tests package doesn't exists)
  • Mouse over the error or click on ‘x’ icon in 'red' > it will open suggestion to fix it.
  • Select option to move the *.java to the given package. (You can select other option too)


Fix Warnings:
  • Mouse over on the warnings or click on Warning icons > it will open suggestion to fix unused imports, methods and values


Finally code will look like this: (Eclipse| WebDriver | JUnit 4)


Tuesday, 1 April 2014

Record | Play | Modify script in Selenium IDE

In this blog, will cover how to record, play and modify the recorded script in Selenium IDE. In this section will record a login sequence to an application, run the recorded script from IDE and modify username and password and run it again with modified values.

To install Selenium IDE, please read my previous post 'Installing Selenium IDE'

Start Recording:
  • Launch Firefox and open Selenium IDE from Tools menu (Ctrl + Alt + S keyboard shortcut)

  • Verify recording button status: Mouser over recording button should show text 'Now recording: Click to stop recording'.
  • Sequence: Now let’s record the login sequence to an application (Gmail)
    • Access application URL 'www.gmail.com'  in browser
    • Enter username and Password.
    • Click Sign-in button

  • Switch to Selenium IDE: Table tab- You will observe few Commands with their Targets/ Values
  • Stop recording:Click on recording button to stop recording. After clicking, mouse over the button should show text 'Click to record'

Play Recorded script: 
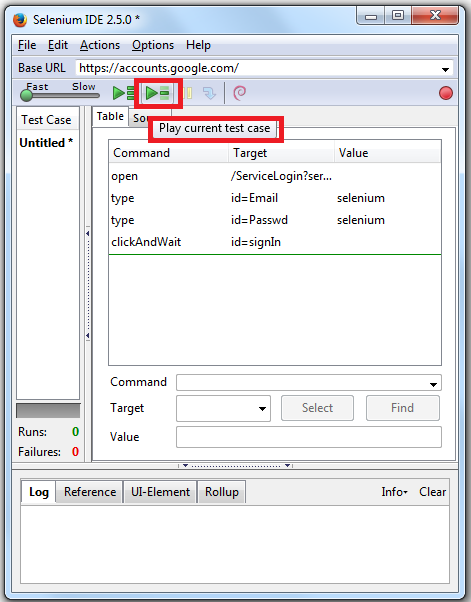
From Action icons click on icon which say ‘Play current test case’(just make sure your Firefox instance should be running).


Modify the script and Play: 
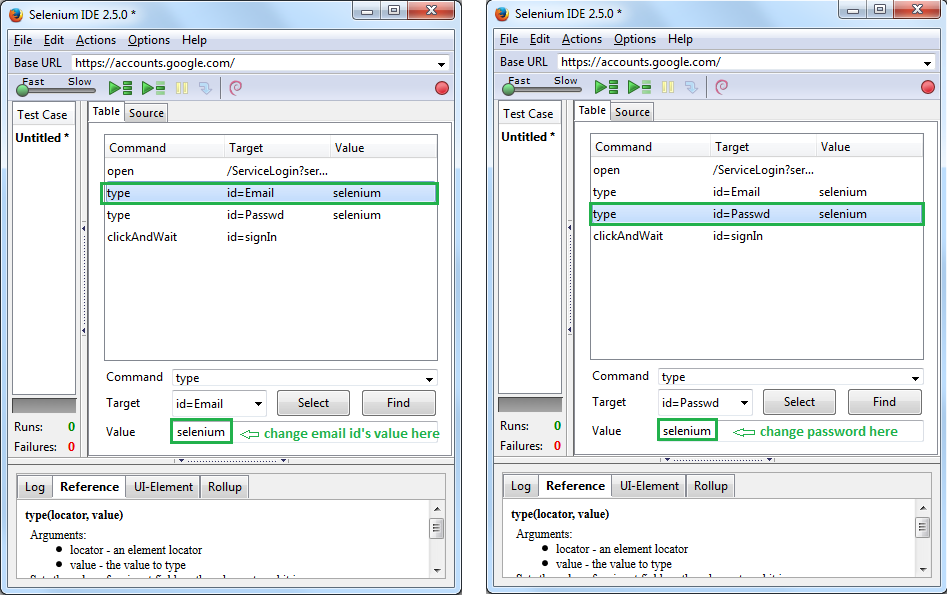
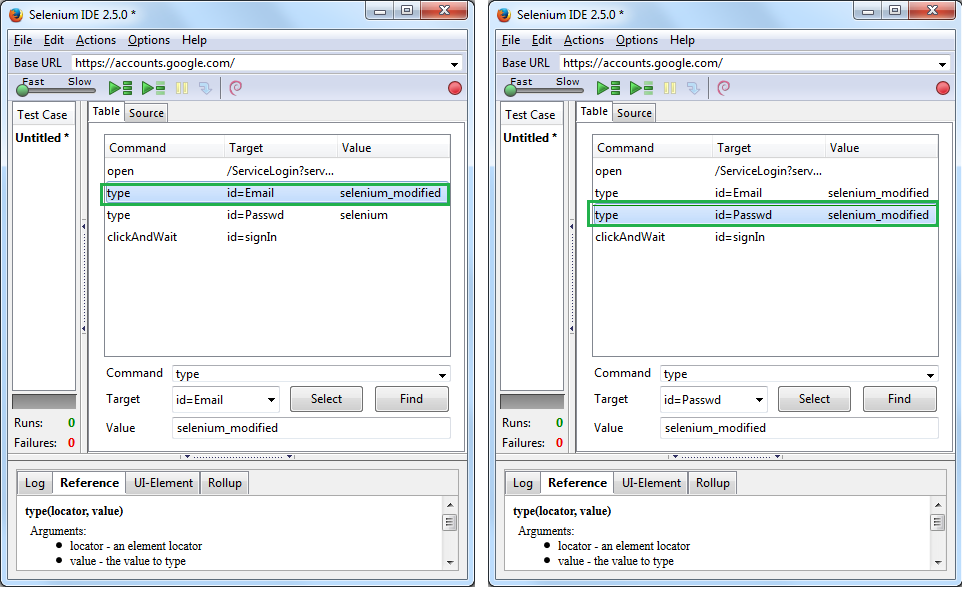
Selenium IDE - Table tab : Click on target you want to modify let’s say user’s  Email id and password.
  • Before modification:

  • After modification:


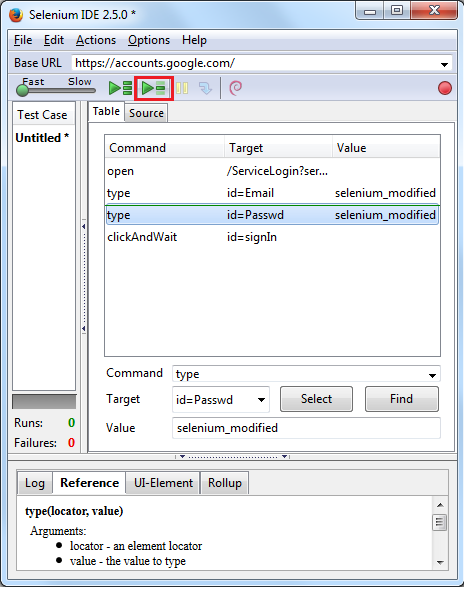
  • Play Modified script: From Action icons, click on icon which say ‘Play current test case’(just make sure your Firefox instance should be running)
Installing Selenium IDE

Selenium IDE:

Selenium IDE is a Firefox plugin which records and plays back user interactions with the browser. Use this to either create simple scripts or assist in exploratory testing.
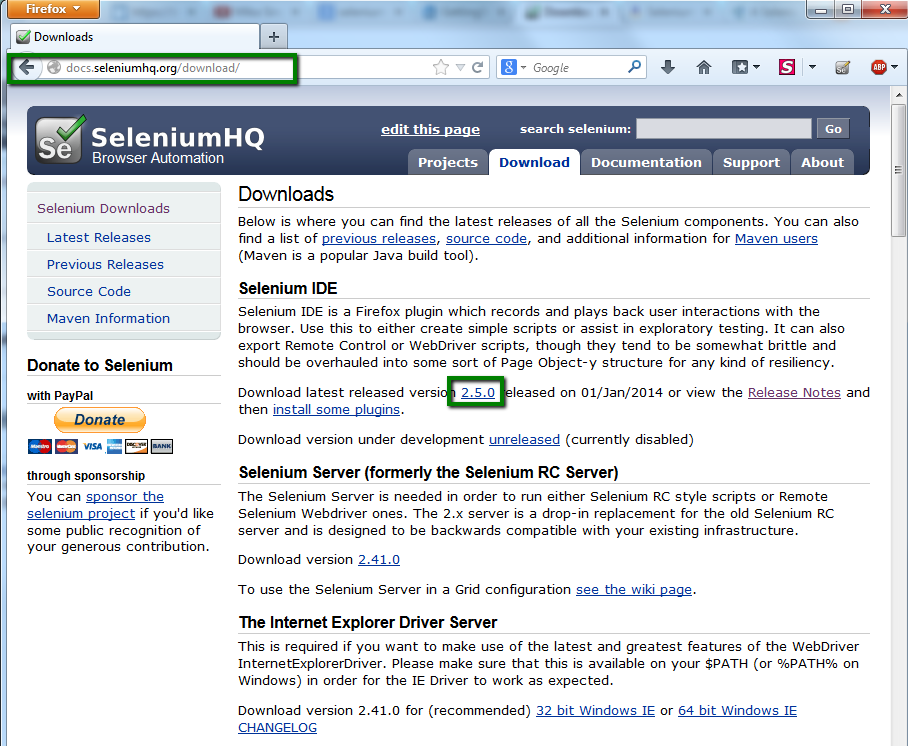
The Selenium IDE is an excellent starting point to start using and learning Selenium. For that lets first add Selenium IDE in Firefox.

Install add-on:

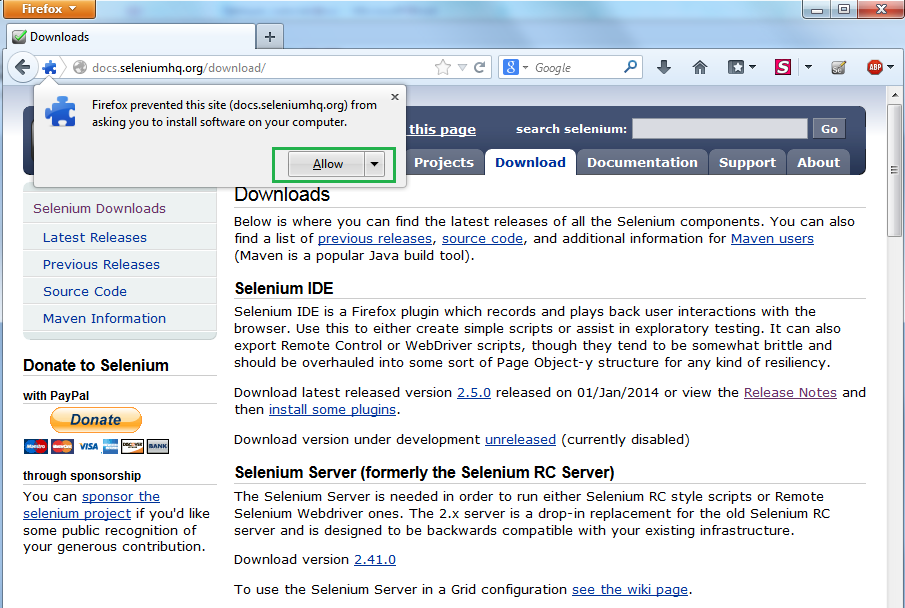
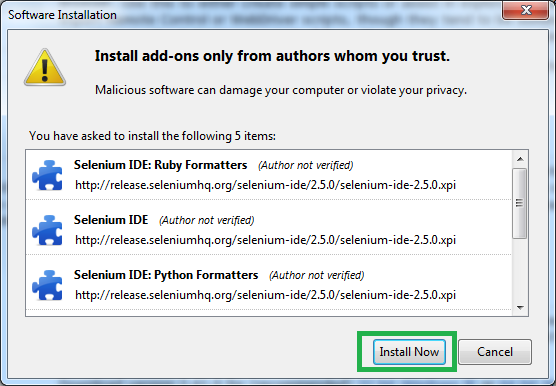
  • A popup appears to ask your permission to install this add-on > click Allow


  • Install the add-on and restart the Firefox.


  • Once you have it installed, launch Selenium IDE by navigating to Tools -> Selenium IDE (Ctrl + Alt + S keyboard shortcut)


  • Launch Selenium IDE:


Selenium IDE overview:
  1. Base URL: Application URL that we want to automate using Selenium
  2. Actions:  Right under the Base URL field, we have the some action icons:
    • Play entire test suite
    • Play current test case
    • Pause /resume
    • Fast/Slow slider - to play script with desired speed
    • Start /Stop recording button etc.
  3. Table /Source – Here is where our script’s functionality will appear/live as we create it. We can also modify our scripts if required and can view the code from ‘Source’ tab.